Alexa - Initial Setup
Here's how to setup the Alexa (Echo, Echo Dot, etc.)
Open your browser and go to https://alexa.amazon.com
Log into your Amazon account. (If you don't have one, scroll down to the bottom to setup an Amazon account)
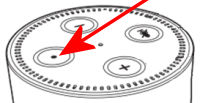
Plug in your Echo. You'll see the color circle in orange.
While it's circlilng in orange, Press and hold the Action button for 5 seconds
On your computer, on the left side of the web page, click on Settings.
Click on 'Set up new device'
Choose the echo device you have and click on it.
Select your own home Wi-Fi network.
Click connect
Note: there may be a step in there that requires you to connect to the Amazon network. Follow the directions to setup up and connect to Wi-Fi.
I will adjust step-by-step directions when I get another chance to set up another system.
Alexa - Sirius Connected
Once you have your Echo setup, go back to the web page where you're logged into your account
On the left side, click on Skills
On the right side in the search box, type: SiriusXM
Click on the link for SiriusXM (it will probably appear first in the list)
On the right side, click on the button for Enable.
You can now tell Alexa to play your SiriusXM radio through Alexa just by saying (for example): Alexa, play SiriusXM Prime Country
Alexa - Delete voice recordings
First, you want to actually HEAR what you'll be deleting? See below in the section 1) before you actually delete it.
There are 2 ways to delete you recordings. And yes they are ACTUAL recordings of what you spoke to Alexa....in YOUR voice !
1) One at a time
Phone App: Open the Alexa app and go to Settings
Go down and press History
Press on the recording you want to delete.
Want to hear it first? Click on the play button. You'll hear YOUR actual voice and what you asked Alexa.
To delete just that recording, then press on Delete Voice Recordings. (or Remove Entries)
Desktop Browser: Go to alexa.amazon.com and log into your account, if not already
On the left side, click on Settings / History
Click on the recording you want to remove. (Then click on the Play button if you want to hear it first)
Click on Delete Voice Recordings (it's in light grey text, and it will only delete that one recording...despite the grammar being that of multiple 'recordings'
2) Delete ALL recordings
Via Desktop Browser: This needs to be done at the web site and can't be done on your phone app.
Go to amazon.com and log into your account, if not already
Under Accounts & Lists, go scroll down and click on Your Content & Devices (in the right column)
Click on the tab for Devices (in the middle)
Click on your echo device
Below those devices is a box that defaults at Device Actions. Click on the double arrow and choose Manage Voice Recordings (even those it's not to 'manage' them...it's actually to delete them)
You'll get a notification in about 3 paragraphs about how it "may degrade your experience". Just continue and click on DELETE.
You will NOT get a confirmation before it's done. Just do it anyway if you want all those recordings deleted.
Amazon Photos on Firestick/TV
To create folder in Amazon Photos to use as a slideshow/screen saver on Firestick or FireTV:
Step One: First you need to upload the images you're going to use.
You can use either method....by way of a A) smartphone/tablet, or B) computer.
Using Chrome or Safari, go to the website: amazon.com/photos
At the top click on Add, then click on Upload Photos
Note: It might be easier to upload according to subject...such as Christmas pictures first, then go back and upload family pictures)
Click on Files and navigate to where the images are you want to upload. (on a computer, you don't click on Files first)
A) Smartphone: Tap and hold on the first picture, then continue tapping on all the remaining images you want to upload. When done choosing, tap on Select at the top of the screen
B) Computer: press and hold the CTRL key as you click on each image you want, then click on Open.
Your images will upload showing a status of "Uploading 1 of 10" (or something like that)
When it's done uploading, click on the X at the top of the screen to close that dialog box
Click on the Add button at the top for the next set of images (for a second album, if you want to keep them in categories
When done uploading....
Step Two: Now you'll create albums to sort them into categories
This time click on Add, then click on Create Album (such as Christmas, or Family)
Select all the photos you want for that first album
Click on Create Album at the top again, then give that album a name such as Christmas
On Firestick, go to app called Photos
Go down to Albums. Select the album you want to use.
Either click on a picture to set it and leave it, or click on the Play button on the remote to play the slideshow
Set the Slideshow to 15 minutes to make the picture last longer. AND click on Set As Screen Saver so that album will rotate as a screensaver.
Chrome AutoFill Fields cleared
To get the AutoFill fields to remove the list of suggestions, all you have to do is go to the field you want to clear and click in the box so it shows the drop-down list of suggestions.
Don't click on it, but highlight the one you want to remove.
While it's highlighted, on the keyboard, do a Shift+Delete and it'll go away.
Repeat for all the items you want removed.
Chrome Background Image
Add or change the google homepage image...easy:
Go to google.com
In the bottom right corner of the browser, there is a button that says "Customize". If you already have a background and just want to change it, the button won't be there, but the image of the pencil will still be there. Hover over it and it will show "Customize This Page"...click on it to choose another image.
Choose Chrome Background and pick one..any one. Or...upload one of your own.
Chrome Block a website
To block a specific domain website, such as blocking all yahoo web pages, you need to add an extension to Chrome
Go to the extension webstore at: https://chromewebstore.google.com/
Search for the extension called: BlockSite: Focus Shield
It is a purple shield (to get the right one)
Add it to chrome
Type in the address: yahoo.com
Then press the [enter] key to have it added to your block list.
Add as many as you want....or delete other ones.
Chrome Blocking Files Stopped
In the top-right corner of the browser window, click the Chrome menu (3 dots at the top right)
Select Settings > Privacy and Security > Security
Change from Enhanced Browsing to Standard Browsing.
Download your file then turn it back on.
Chrome Favicons Changed
Note: This will not work for a web site that already has a Favicon. Only for sites that do NOT have a Favicon set.
Otherwise, for those sites that don't have one:
First you need to install the extension called Bookmark Favicon Changer. Click that link and a tab will open for you to download the extension.
At the top right, click on the green button for Add To Chrome, then close that new tab.
You only have to do that part one time.
Once installed, Click on the settings icon (the three dots) and click on More Tools > Extensions
In the area for Bookmark Favicon Changer extension, click on the link for 'Details'
Scroll down and click on 'Extension Options'
To CHANGE an icon for a bookmark you already have:
Right click on the icon and choose Change Favicon and locate the icon you want to use.
To ADD an icon that has your own image:
Click on the button labeled 'Shortcut'. This is the page where you will change any and/or all of your icons.
Step 1: Put in the web site address you want used.
Step 2: Type the name you want shown on your bar for the link.
Step 3: Locate the .jpg or .png file you want used. You can NOT use an icon in a .dll or .ico file
Step 4: You must click on the 'Test' button before you can continue. A new browser will open. If it works, close that new browser window.
Step 5: Choose "First Bookmark..." (you will be able to move it later.
Step 6: Click on Add
Step 7: Close the new tab if the page displays properly. If not, ensure you have the https:// in the url.
Step 8: Click & drag your new icon to the location on the bar that you want it.
Repeat steps for all icons while you're still on that editing page.
Chrome Favicons Folders restore to yellow
To restore the yellow icons for the folders, in the address bar, go to: chrome://flags/#chrome-refresh-2023
Change from Default to Disabled for Chrome-Refresh-2023 AND for Customize Chrome Side Panel
Close Chrome and open again. This will restore the yellow icons for the folders
Chrome Gmail background image
To make a background image of an image you want to upload:
Go to: www.photos.google.com
Go to Albums
Create a folder called Backgrounds (or whatever you want)
Click on the Add Photos (at the top), and upload the image(s) you want
Now go to your gmail page. Click on the gear icon and choose Settings, then choose Themes.
Click on My Photos at the bottom left
Navigate to your Backgrounds folder (or whatever name you used) and choose your image.
Click on Select, then click on Save.
Chrome Logout/Login to another
To log out of an account that is shown at the top right icon and log into another.
Do NOT create a new profle and do NOT add another account !
Click on the 3 dots at the top next to your profile icon and choose Settings
Click on the button for Turn Off, LEAVE UNCHECKED the box for "Clear bookmarks, history....." then click on Turn Off again.
This will turn off Sync and log you out.
You can then log into the other account and turn on Sync on that other account.
Chrome Passwords Saved
To Export Chrome Passwords before you do a clean install of Windows:
Chrome menu (3 dots at top right of Chrome) > Settings > AutoFill > Passwords
At the top of the Saved Passwords section on the right side, just to the right of the Add button, click on the 3 dots, then click on Export..."
Save the file.
To Import
In the address bar type: chrome://flags
Do a search (at the top) for: Password
Scroll down to “Password import" and enable it.
Chrome menu (3 dots at top right of Chrome) > Settings > AutoFill > Passwords
At the top of the Saved Passwords section on the right side, just to the right of the Add button, click on the 3 dots, then click on Import
Chrome Tabs with excess info on hover
When the window tabs display excess info (like 2 lines of info), it's a bit much.
To disable and trim this down:
In the address bar, type: chrome://flags
Scroll down about half way and look for Tab Hover Cards and disable it
Chrome Grouped Tabs Turned Off (Android Phone)
How to Turn turn off Chrome from creating grouping of tabs.
Step 1: Open a new tab and go to: chrome://flags
In the "search flags" box type: Tab Grid
Change to Disabled
Step 2: Click on the open tabs icon (with the number at the top)
Tap on the tab that has the groups
Tap on the 3 dots at the top and choose "Remove tabs from group"
Tap on each of the tabs, then tap on "Remove" (top right corner)
Chrome Third-Party Removal
How to remove Third Party Access (that you previous clicked on "Sign In With your Google Account":
A) On a tablet or phone:
Tap on the 3 dots at the top and go to Settings
Tap on your Google account then tap on Manage Your Account
Tap on the tab at the top for Security.
Scroll down to "Your connections to third-party apps & services" and tap on See All Connections.
Tap on any item you want to remove, then tap on "Delete all connections you have with xxx. Then tap on Confirm
B) On a laptop/desktop computer:
Tap on the 3 dots at the top and go to Settings
Then click on Manage Your Account.
On the left, click on Security
Scroll down to "Your connections to third-party apps & services" and tap on See All Connections.
Tap on any item you want to remove, then tap on "Delete all connections you have with xxx. Then tap on Confirm
Chrome web page saved as MHTML
If you can't save a web page in a single .mhtl file, here's the fix:
On the shortcut the taskbar, right click on the Chrome icon, then right click on Chrome again at the bottom of that list, and choose Properties
At the end of the Target line press the space bar, then add the following:
--save-page-as-mhtml
Click on Apply > OK
Close Chrome and re-open.
When saving the file it will be called 'Webage, Single File' and it will save as a single offline mhtml file.
Chrome Downloads back to the bottom
If your Downloads notification start showing at the top instead of the bottom. Here's the fix:
In chrome, go to: chrome://flags
In the search box at the top, type in Enable download bubble
There will be 2. Get the first one (without the v2).
If it's set to Default, change it to Disabled
Classic Shell Explorer Bar
In a file explorer, click on the Menubar, select View > Toolbars > Classic Explorer Bar (Win10)
In Windows 11, if you can't get it to work, or if you disabled it and can't re-enable it:
Install the program (temporarily) called Winaero Tweaker using Normal Mode for installation (free). Get it Here.
Install and run the program
On the left side, click on Enable Ribbon. Choose "Create Desktop Shortcut for Ribbon Explorer"
Minimize the program
Double click on the new icon on the desktop called File Explorer (No Tabs)
Close the Control Panel window that opens
With the ribbon, you can now get the File Options, click on the down arrow and choose Classic Explorer Bar to re-enable it.
You can uninstall the Winaero program, or browse through other settings to change.
Dell Dock Crash
Unfortunately, Dell Dock may crash and loose all of your icons on it. Here's how to get it back.
First go to the folder: Users\Tracy\AppData\Roaming\Dell\DellDock
Copy those files to an flash drive
Uninstall Dell Dock. Then search and remove ALL DellDock folders you find.
Restart the computer again and reinstall Dell Dock and choose NOT to automatically create icons on it.
Drag just one of the icons from the desktop to the dock, but choose to keep the icon on the desktop also.
Close the Dell Dock
Go to the folder: Users\Tracy\AppData\Roaming\Dell\DellDock then rename those files to -OLD
Copy the files from your flash drive back to the computer in that same folder.
Restart DellDock and icons will be back to the way it was before....but you may have to go to Advanced Settings and make the changes for
position & color of the dock.
EaseUs Partition
After installation, to partition the drive:
Click on Resize/Move Partition
Along the top green bar, click on the far right and drag down to the left. The size numbers will change automatically.
Example:
Unallocated before: 0
Partition Size: 200700.0
Unallocated after: 514179.5
This will put the C: drive down to about 200GB and put the 2nd partition to about 500GB
Click on Create Partition
Type the Label and name it Data
Format that partition with the drive letter of T:
Click on OK, then say YES to complete the operation and restart the computer
The T:\ will change to D:\ as originally desired.
eBay hosted at Google using Embed
Google considers "mixed content" as an "unsafe site", and if using an embedded image with an http link in listing descriptions, many people will no longer see your images in your description. It will take extra clicks to see your beautiful handy work for your items. And eBay now requires images with http links be converted/moved to https servers.
So now, we're caught in the middle.
Most sites will charge you a fee for hosting if a https link is required.
However, if you have a Google account, you can get up to 15GB of storage for your images to embed into your description. Note: Google Photos is nice, but you can't sort by name. With Google Drive you CAN sort the images by name, and the image thumbnails are a lot smaller (and easier to see) than Google Photos.
USING GOOGLE
Now, here's the kicker: You can't just use your Gooogle Photo's account to store them, then use the link to that image to put in your listing. You CAN...but only people who are logged into their own Google account will see the images. You need EVERYONE to see your images, regardless if they are logged into Google or not. So you need to actually embed your image using an https server (hence...Google Drive.)
While logged into your Google account, go to Google Drive (https://drive.google.com/)
Create some folders ahead of time....to make it easier down the road.
Click on the My Drive link, then click on New, then click on Folder. I called my folder eBay and will use that for this example. Then click on the eBay folder. Now click on New again, then click on Folder.
Here is where you want to create as many ebay folders as you desire. I created folders called: Aprons, Clothes Pin Bags, Checkbook Covers, Potholders, Oven Mitts (and others).
Since all of the eBay images need to be 'shared', right click on the eBay folder on the left. Select 'Share...'
Click on Advanced in the lower right corner
In the section for 'Who Has Access', change that and choose 'On - Public On The Web'
Leave the rest as 'Access: Anyone (no sign-in required)' & 'Can view only'
Click on Save, then click on Done
Open your File Explorer to the folder where you images are stored on your computer. Drag and drop into the appropriate folders you just created. All images you drag to your eBay sub folders will automatically be set to be shared with the public without signin required.
Hold on...there's more to it than that. You CAN'T just open the image / right click / properties and get the image url. It will NOT work properly....read on
After you have images in the folder(s), right click on the image you want and choose 'Get Shareable Link' (or click on the link on Google Drive's menu bar...currently it looks like a sideways paperclip).
Click once to highlight the url, then copy it.
You'll need a blank document open to constantly do a copy & paste. Notepad will work.
Paste in the code. It will look similar to this:
https://drive.google.com/open?id=0B8KzbIbRLQWnRW9HWWVhbGdRU2M
Change the first section. Change https://drive.google.com/open?id= to https://drive.google.com/uc?export=view&id=
You now would use this to embed your images into ebay description listings: https://drive.google.com/open?id=0B8KzbIbRLQWnRW9HWWVhbGdRU2M as the src for your image.
If you chose the link for "Share...", you'll see the link similar to this: https://drive.google.com/file/d/1NdZOmBgoi2MUFKGzkm2XSz9IoHEL87Hy8A/view?usp=sharing
In that case, cancel and go back and choose 'Get Shareable Link'
eBay Landing Page (a.k.a My eBay)
Log into eBay
On the left side under Selling, click on All Selling
On the top right it says: "The My eBay landing page is set to (summary) Change" - click on change
Change to All Selling
Click Apply
Then you will have selling at the top, and all other sections below. You can modify a few sections on what to show, and move sections up and down, but some CANT be removed.
eBay Listing End Date
How do you find out when a listing is at it's 30-day end date? Even though eBay has ALL listing as "Good 'Til Cancelled" (never ending), the listings are based on 30-days, then automatically listed again for another 30 days (and on and on and on)...unless the seller ends the listing so as to not go over the monthly limit (like me).
But you CAN find out when the current 30-days is up.
When doing a search, sort by "Ending Soonest". The amount of days will show up.
Now if you have a specific item in mind, scroll down and copy the eBay Item Number
Paste that into your search box. THEN sort by "Ending Soonest". It will then show you how much longer the listing is for.
OR...
Copy the Item Number, then head to www.watchcount.com
Paste in the item number, click on the Show Me button, and it'll pop up. It even shows the start date, end date, time left...and even the amount of peopel 'watching' the item.
eBay Printing Labels To Small
The fix is not in your printer, but in the IE browser
Click on the Chrome Menu icon (3 dots at the top right) > Print...
Click on More Settings
Below that will Scale. Change it to Default. Then Print your document
That will fix your problem real quick ! :)
eBay App sounds on Tablets, Nooks, etc
Getting the Item Paid to make the sound when you get paid from an eBay sale (or to have a sound for Item Sold), the change needs to be made in the eBay app.
Go to the eBay app (not eBay web site)
Tap on Settings (at the bottom)
Tap on Notifications / Edit Settings
Scroll down to the bottom for the section Seller Notifications
Tap on the one(s) you want to have a notification sound for.
Encrypt ZIP or 7z files
When you first create the zip file, Put in a password and Reenter the password and DON'T FORGET IT.
Click on OK.
Favorites on Roku TV
To set Favorites on your Roku TV, go to the Home page
Go to TV Inputs
Go to Live TV
Favorite Channels will be on the sub-menu
Enable 'Favorite channels'
Facebook: Adding Friends into a Group Problem
Getting a friend added to your Friends can only be done with the right privacy settings by the other person
Tracy wants Mark to become a member of group called Residents Of RP
However, Mark can't be a member because he's not in Tracy's 'Friends' list.
Here's the fix:
Mark, on HIS account in Facebook, must go to:
Home. Tap on the Menu (3 horizonal lines at the top or bottom of the screen, depending on your device)
Scroll down and tap on Settings & Privacy
Then tap on Settings right below that
Scroll down to the 3rd section titled 'Audience and Visibility'.
In that section tap on 'How People Find and Contact You'.
Tap on 'Who can send you friend requests?'
Tap on Everyone.
Now Tracy can do a friend search for Mark. And when she finds the right one, click on Add Friend.
This will send Mark a request notifying him that Tracy wants to become 'Friends'.
Once Mark accepts the request, they are now 'Friends'.
At this point, because Tracy is already a Residents of RP group member, she can now go to her group and send an invitation to Mark to join the group.
Facebook: visit without logging in
Create your account if you haven't done so.
To make your business public, you must:
Create a Page and go through the steps of creating the page.
If you already created a page, then log in and go to the page
Click on Edit Page (upper right corner)
Ensure that the top section for Page visibility has the dot in the circle for Page Published.
Also ensure that there are no age restrictions and that United States is not as a restriction.
Firestick Powering with Alexa
When you just can't get Alexa to power on/off a Fire Stick'd TV, you can force it manually.
Assuming you already have the Firestick renamed and it's linked in the Alexa app, you need to create 2 routines:
Open the Alexa app on your phone.
Tap on More (at the bottom right of the app)
Choose Routines
1) Tap the + at the top right to create a new one
2) Tap on the first + for "Enter routine name"
3) Give it the name of: Power on Tracy's TV (or whatever TV you have renamed it)
4) Tap on Next (at the top right corner)
5) Tap on the + for "When this happens", then choose Voice
6) Type: Power On Tracy's TV
7) Tap on Next
8) Tap on "Add Action"
9) Scroll down and tap on Fire TV
10) Choose the name of the TV you want (in my case Tracy's TV)
11) Tap on "Power on". If you do NOT see the option for Power On, then your TV is not capable of CEC or CEC is not turned on in the settings of your actual TV.
12) Tap on Next
13)Then tap on Save
Repeast steps 1-12 for a 2nd routine that you will call: Power Off Tracy's TV
Firestick Reset to Factory w/o PIN
Go to My Fire > Reset to Factory Default
When the PIN dialog box shows, press the BACK button
Go back into My Fire > Reset to Factory Default
When the PIN dialog box shows, press the BACK button again
Repeat 4 more times until you get the notification that the Factory Reset will take place....etc.
Firestick Autoplay App
FIRESTICK/FIRE BASED TV's
Automatically have YouTube TV (or any other app) start when you turn on your TV.
First, open YouTube TV and go to the channel you want.
Go to Apps/Get More Apps
Part A: Search for and download & install the app called Downloader (it's an orange icon app)
Part B: Go to Firestick Settings > My Fire TV. If you see Developer Options right below About, continue with part C
If you do NOT see Developer Options below the About link, click on About
With Fire TV for Fire TV STick highlighted, press the OK button on the remote 7 times. Go back to the home page, then go to Settings > My Fire TV and you should now see Developer Options below the About link
Part B: Google/Hisense TV's
Download the app Downloader as mention above. Open the app and click on Allow. If given the notice "...phone not allowed, click on Settings", then click on Settings button on the screen and turn on Downloader.
Proceed to Part D:
Part C: Click on the Developers Options. Ensure ADB Debuggin is turn On. If not, click it so it turns on.
Go down to Install unknown apps and click. Go to Downloader, and click so it is turned on.
Part D: Go Home again, then Go to your apps and open Downloader. Click on OK to allow, then click on OK again
Press the UP button and press OK. Type in box: 310962 then click on Go.
When you see the white screen, at the bottom left you'll see Cancel and Install links. Press the down button and go right on your remote and highlight Install, and press OK.
When it says App Installed, click on OK.
When it's complete, highlight and click on Delete, then confirm Delete
Press the LEFT arrow until the orange left words are highlighted, and go up and highlight Home....then press the Home button on your remote to get back to your Firestick home page.
Go back in to Settings > My Fire TV > Developers Options. Go down to Install unknown apps, and down turn on Launch on Boot, and click so it is turned on.
Go back to My Apps and start the app called Launch On boot
Press the right arrow until you see Get Started....click on OK
Press OK to Enabled to turn it on.
Go down to Select App, highlight YouTube TV and press OK
Go up to Launch when device wakes up and enable it.
Highlight and press the Test button
If YouTube starts, all is ok.
Firestick: Go back to Home and press the Play/Pause button AND the OK button at the same time (for about 7-8 seconds or so) until you see the message about Fire Stick is powering off. Release the remote buttons
Let the system do it's things and it'll come back on with YouTube TV.
Google/Hisense: Power off TV and turn back on.
Foxit Fillable with larger text
To make text larger in a fillable PDF form, use the Typewriter feature
Click on Forms > Typewriter > Typewriter
Then click in the area you want to type. You can change the font and the size. It creates a text box of your text.
You can move the box into position if necessasry.
Foxit Classic Toolbar
This does NOT work for FoxIt Version 7...only version 6 or lower
Click on Help / Change Toolbar Mode
Click on Classic Toolbar Mode
Google Sheets Headers
To make a Header and have it print on every page:
First select the first row, right click choose View More Actions > click on Freeze Up To Row 1.
This makes the first row a Header row
When printing, the header will be printed on every page.
Delete Google+ Account, but not your Google Account
This will delete your Google+ account, but not the actual Google Account
Go to this link first
http://plus.google.com/downgrade and sign in.
At the bottom of the page, check the box next to "Required."
Click or touch Remove selected services.
Alternate ways:
Open Google+.
In the top left corner, click the drop-down menu > Settings.
Scroll down to “Disable Google+” > click Delete your entire Google profile here.
Scroll to the bottom of the page > check the box next to “Required” > click Remove selected services
Headphone Connect Bluetooth
To connect bluetooth headphones (I have the Onn A017)
Press and hold the middle button to turn on the headphones
When it's solid blue, press and hold again until it flashes blue and red
On the computer go to Settings | Devices | Add Bluetooth | click on Bluetooth
Select the Onn HPhone
LastPass Dropdown changed
If the "Improved Save & Fill" isn't working for you (as it wasn't for me)...
Open the vault
On the left side, go to Advanced Options
Scroll down and turnn off "use improved save & fill"
Malwarebytes Deactivate Premium (Trial Expired)
When you get a message about your trial period has expired, and/or need to purchase, here's how to turn it off:
Open Malwarebytes, and X out of the dialog box (if you see it)
Click on the gear icon at the top (between the bell icon and the ? icon)
Click on Account
Click on Deactivate in the colum for License Key
All done. Close and reopen the program and you'll be all set.
MarkLife Label Length
To make a label a specific length:
Don't use Continuous...instead use Gap Label.
You can then change the length of the label to what you want.
Media Player: Menubar restore
To view the menubar in Media Player, press Alt+H, you can then to go to File / View / Show Menu Bar.
Microsoft Office: Turn Off OneDrive Personal Folders
.
Gotta love MS
Here's how to turn off the OneDrive Personal Folders option when saving documents in Microsoft Office
In Word, Go to File > Account
Scroll down to Account Privacy and click on Managed Settings
Go way down to Connected Expericnce
UNCHECK all of the boxes in that section then click on OK.
Close Word (as directed)
Open Word and click on OK that privacy settings have changed.
Open Excel and click on OK that privacy settings have changed.
Microsoft Excel/Word: Encrypt Document 2007
To encrypt MS Excel document (2007...maybe higher, not sure)
Click on File (orb icon at the top), then click on Prepare > Encrypt Document.
Put in a password, click on Yes, then re-type the password to confirm
Microsoft Excel: Replace line breaks 2007
To remove manual line breaks in a sheet or just a column
For the entire spreadsheet, don't select anything. But if you want to do it in specific columns, then select the column first.
Click on the Find & Select button, then click on Replace.
In the Find What top box, press Ctrl+J (you won't see anything happen because it's a hidden code)
In the Replace With box, leave it blank
Choose Replace All.
Microsoft Word normal.dot fix 2007
Restart the computer for a fresh boot
Open a File Explorer
Click on Tools, Folder Options (or Organize, Folders and Search Options)
Click on the tab for View
Click in that dot for "Show hidden files and folder" and say Yes, you're sure)
Click on OK to close the dialog box
choice of file locations
C:\Documents and Settings\OWNER\Application Data\Microsoft
C:\Users\OWNER\AppData\Roaming\Microsoft\Templates
Once you find it the file called normal.dot (or normal.dotm),
delete it.
Note: If you don't see that file in the folder, then you'll need to find it in another location
click on Start, Find.
do a search/find for all files and folder and search for: normal.dot
write down the location of each of the files it finds.
You'll have to go to each of those folders in the same manner as above until you find and delete them all.
Reset the computer and try opening MS Word again.
Microsoft Word: Business Cards 2007
Open a blank Word document. Click the Mailing tab. Click on Labels.
In the dialog box, click on Options (at the bottom)
Top option: leave at 'Default Tray'
Middle option: Change to Avery US Letter
Bottom option: Choose #5371 then click on OK, then Click on New Document.
After you insert a graphic, right click on it and choose Text Wrapping / Tight. This will allow you to move the graphic around in the card.
Create one label, then copy & paste into each of the remaining 9 sections.
Microsoft Excel/Word: Hiding Columns 2007
Best way to not print a column and/or row is to use the following procedures. This procedure easily shows you that some columns are hiding:
In MS Excel:
Select the column/row you don't want to print
click on the Data tab
Click on Group
Now to hide it, click on the - icon at the top of the column (or on the side of the row). Click on the + icon to reveal the column/row again again
In Quattro Pro:
You have to select the column or row, then right click and choose Hide.
To reveal again, you have to select the column/row before and after, then choose Unhide
Nook wallpaper sizing
To make the wallpaper on the Nook look proper, you need to have an image sized at 1920x1280.
You will lose some of the top and bottom sections, so have your image centered that you want.
Notepad to stop autosave
With the newest update, Notepad will automatically save whatever you are typing, when you close the program. Next time you open NotePad, that document (or tabs) will open so you can continue where you left off....YUK !!
You CAN turn it off so it doesn't automatically save
Open Notepad
On the right side, click on the Settings icon
On last item that states "When Notepad Starts", click on the drop down and choose "Open a New Window"
PayPal: Continue Shopping Redirect Properly
If not adjusted, the dialog box will pop up and say "Please open a new browser window to continue shopping".
By adding the following code, it will re-direct back to where you want.
In the current form for the Add To Cart link, find the code that says
<input type="hidden" name="currency_code" value="USD" />
copy the next line of text and paste it immediately AFTER the code shown
above.
<input type="hidden" name="shopping_url" value="http://yoursite/index.html" />
(Don't forget to change the site address in the value area)
One more thing: To keep the links from opening on a new page, change the
target from "paypal" to "_self" to the form tag
PayPal: Detailed View of transactions
To view transactions in Detailed View in PayPal, use this link (after you are already logged into your PayPal account.
Note: This link will log you into YOUR transaction classic view list assuming YOU are logged in alreaday.
https://history.paypal.com/cgi-bin/webscr?cmd=_history&switch_classic=true
If this does not work for you, please let me know....cause it worked for me :)
PayPal: View Shopping Cart button
Here's how to display the  button.
It can easily be inside a <li> tag. Just make adjustments for proper positioning
Use the following code (make sure to change the email address value):
<form target="paypal" action="https://www.paypal.com/cgi-bin/webscr" method="post">
<!-- Identify your business so that you can collect the payments. -->
<input type="hidden" name="business" value="you@youraddress.com" />
<!-- Specify a PayPal Shopping Cart View Cart button. -->
<input type="hidden" name="cmd" value="_cart" />
<input type="hidden" name="display" value="1" />
<!-- Display the View Cart button. -->
<input type="image" name="submit" border="0" src="https://www.paypal.com/en_US/i/btn/btn_viewcart_LG.gif" alt="PayPal - The safer, easier way to pay online" />
<img alt="" border="0" width="1" height="1" src="https://www.paypal.com/en_US/i/scr/pixel.gif" />
</form>
One more thing: To keep the links from opening on a new page, change the target from "paypal" to
"_self" to the form tag
Thanks to PayPal Intregration Center for these tips
Printer Kernel_exec_st Error
I got this kernel_exec_st error on my HP Envy 5055 All-In-One Printer and found this quick fix:
On the printer display screen, press the WiFi icon. Then press the gear icon at the lower left corner.
Scroll down to, and press on, Advanced Settings.
Turn off the IPv6 and press Yes to confirm you want to shut it off.
Phone: Backup Contacts
On phone go to contacts > Fix & Manage (bottom right corner)
Export to file
Choose account
"Export to vcf file"
Choose Save
On phone, go to Files > Downloads. You'll see your file there.
On computer, connect phone and go to the phone folder of Download
Copy (or move) the "contacts.vcf" file to external backup drive
Phone: Buttons at bottom
On phone go to Settings > System > Gestures > System Navigation
Change the navigation to 3-Button Navigation for the Home, Back & App Preview
Phone: Clock changed to Analog
Your phone changed to show the clock in analog instead of a digital time. (Peek Preview)
This is NOT the lock screen...this is when you move the phone and before you unlock it.
To revert back to Digital, go to Settings / Display / Advanced/ Peek Display / Settings / Clock Style
Chose the Digital version, then tap on Done
BOT on Android location
The location on an Android phone where Overdrive downloads your BOT is found here: (after you connect your phone to your computer)
Android/data/com.overdrive.mobile.android.mediaconsole/files/OverDrive/
You can copy the mp3 files from your phone directly onto your computer and enjoy.
Phone: Folder shortcut using Astro
To create a shortcut on a homepage on your phone, get the app Astro and install
Long press on your home screen
Press Widgets
Long press and drag the Astro widget to your screen
A dialog box will open. Choose a folder you want. If you want the folder from your MicroSD card, click on the 'home' icon, then press 'SanDisk SD Card'
Locate the folder you want and tap on it. You'll see the files in that folder.
Press OK. It'll look like the OK is grey'd out, but it's not.
'Google Discover' removed from home page on phone as a screen
If you swipe your phone to the right, you'll see Google Discover as a full page on your phone.
To remove this completely, press and hold in a blank area of your home page.
Press on Home Settings.
Press on Swipe Access.
Choose Nothing (instead of Google Fee).
All gone.
Additional screens for more apps displayed
Default settings on the phone are for about 3 screens. But you CAN have more.
Go to the last screen. Press and hold on an icon and drag to the right.....drag as far as you can on the screen. A new screen will be created for you to add more icons.
Droid Rename Motorola Phone
Using a Motorola Droid Maxx X1080, you can rename the phone by going to:
Settings > Bluetooth.
At the bottom of the screen, tap on the 3 dots
Tap on Rename Phone
Type in the name you want to use, then tap on Rename
Phone: Reset To Factory
Android:
Step 1: Turn off the phone completely.
Step 2: Press and hold the power button and volume up button together until the recovery mode screen appears.
Step 3: Use the volume buttons to navigate and select the “Factory reset” or “Wipe data/factory reset” option
Motorola Android:
Charge your battery 30% or more.
Turn off the phone.
Press and hold the Volume Down button and the Power button at the same time until the phone turns on.
Press the Volume Down button until you see Recovery mode.
Press the Power button to restart in Recovery mode.
If you see an Android robot with a red exclamation mark or "no command", press & hold the Power button and, while holding it down, press & release the Volume up button.
Use the Volume buttons to scroll to Wipe data/factory reset, then press the Power button to select it.
Use Volume buttons to scroll to Factory data reset, then press the Power button to select it.
Allow a few minutes for the reset to complete.
Use Volume buttons to scroll to Reboot system now, then press the Power button to select it.
Allow several minutes for the reboot to complete. If the phone doesn't finish rebooting, press & hold the Power button until the screen turns dark, then release it to power up normally.
IPhone: (may or may not work)
iPhone X, 8 and newer: Press and hold the volume up button, volume down button, and the side button at the same time.
iPhone 7/7 Plus: Press and hold the volume down and side buttons at the same time.
iPhone 6S and earlier: Press and hold the side and top buttons at the same time.
At this point, your iPhone is entering the data recovery mode screen and this will delete all data on your phone. As if it were a new phone.
Samsung TalkBack turned off
With TalkBack turned on:
Tap to select an item, then double-tap to activate your tapped icon
Use 2 fingers to scroll.
When "System navigation" is set to "Gesture navigation," for gestures like home, back, or recent apps, use 2 fingers instead of one.
There are 3 different ways to turn it off:
Option 1: Press volume keys
Press and hold both volume keys for 3 seconds.
To confirm that you want to turn TalkBack on or off, press both volume keys again for 3 seconds.
Once turned off, you can turn it off permanently. Go to Settings > Accessibility > TalkBack. Then turn "TalkBack shortcut" to off.
Option 2: With "Hey Google"
Say "Hey Google, Turn off TalkBack" or "Hey Google, Turn on TalkBack"
Option 3: With device settings
Go to Settings > Accessibility and then TalkBack.
Turn Use TalkBack on or off.
Select Ok.
Quicken Historical Prices stopped
To stop getting historical prices and keep the total investing amounts the same until the next "Download Quotes" for the quarter:
Investing > Download Activity > Historical Prices
Click on Clear All
Click on only one investment that you know does NOT have a stock symbol (such as TSP)
Click on Update Now
Close the program and re-open.
Roku Background not changing
When the background won't change or show the image of your choice:
Go to Settings > System > Power. Choose System Restart.
TV and Roku will restart and the background images will now work.
Skype Not starting with Windows
When an update make Skype starting at Windows Startup, here's how to stop it again:
All Settings | Privacy | Background Apps
Click on Skype to turn it off.
Better yet...Turn them all off, not just Skype
SyncBack: Setup
Unplug any USB drives you have connected (the USB Dongle for the mouse can stay in)
Open a file explorer.
Right click on This PC > See More Options > Manage
On the left side, Click on Disk Management (about 2 up from the bottom)
Now plug in your USB backup drive. You will see a new drive listed immediately. That will be will your new Backup drive. Click on that drive (probably Disk 2 and it will state in there REMOVABLE right under the word Disk 2.
Click on that drive, then right click on it and choose "Change Drive Letter and Paths..."
Click on Change and choose S (as in syncback)
Click on OK, then click on YES when it says "some programs that rely on drive letters....."
Right click on that drive again and choose Properties
In the top white box give your drive a name: Backups
Click on OK
Leave the drive connected and close Disk Management.
In the File Explorer, click on your new Backup drive. On the right side, right click and choose New > Folder and give it the name of: Backups
Go to www.2brightsparks.com/download-syncbackfree.html
Click on the button link called Download SyncBackFree ( the 2nd link that does NOT have the icon before the words).
When you download it, it MAY say "this file may harm your computer...", Choose Keep if asked.
Go to your Downloads folder and run the file you just downloaded called SyncBack_Free.exe
When asked, choose Yes to "allow this app...."
Put dot in circle for I Accept the agreement, then click on Next
Click on Next again, then Next again.
SyncBack will now install.
Click on Finish and the program will now open
Setting up the profile:
A)
At the bottom left, click on New, then just click on OK (Backup already has the dot in it)
For the name of your profile, type the name Desktop (this will be to backup all the files & folders you have on your desktop screen, then click on OK
Keep the dot in the circle for Backup and click on Done
Put the check in the box for "Do not prompt me again", then click on OK (the 2nd and future times you won't get this prompt)
Here is where you choose the folders you want to back up:
In the top long white box, click on the yellow folder at the end of white box.
On the left side of the dialog box that pops up, click on Desktop
Then click on Select Folder
In the 2nd long white box, click on the yellow folder at the end of the white box.
On the left side of the dialog box, click on your USB drive. Then click on Backups on the right side of that dialog box
Then click on Select Folder
Click on OK at the bottom to complete your profile
In the confirmation dialog box, put a check in the box for "Do not prompt me again" and click on NO (the 2nd and future times you won't get this prompt)
B)
Right click on your new profile and choose Modify
On the left side, click on Expert
On the left side again, click on Compare Options
On the right side, put a check in the box at the top for "Skip the Differences screen when this profile is run"
Click on OK
Profile #1 is done for the Desktop items you have.
Now you will go back and repeat steps A & B above and this time choose the Downloads folder.
Repeat Steps A & B above for the remaining (Documents, Pictures, Music & Video)
C)
Now you create a group so all the folders will backup all at once when you run your backups:
Create a Group:
Click on New, type Monthly Backups, then put the check in the box for "This is a group profile"
Click on Next
All the profiles you create will be on the left side, then click on the double arrow (bottom one) and all your profiles will be set to run in one big swoop.
Click on OK
Your SyncBack main window will now show in the Profile column one item called Monthly Backups. If you click on the arrow at the beginning of those words, you'll see all of the individual profiles listed.
Click on the 3 black lines at the top left corner of the program (right next to Profiles)
Click on Preferences
Remove the check in the box for Minimize To Tray
Close the program, but when the dialog box shows "Would you like to minimize...", put the check in the box for DO NOT PROMPT ME AGAIN, then click on NO
Now you need a shortcut to SyncBack on your desktop to remind you to do it.
Click on Start, All Programs, 2BrightSparks, SyncBack Free, then right click on SyncBack Free and choose Send To, then choose 'Desktop (create shortcut)'
D) (done monthly)
Open SynBack again with your desktop shortcut. You'll see your Group profile that has all the folders listed below that will back up when you run your backups.
With your backup drive connected, click on Monthly Backups, then click on Run (at the bottom)
When the backups are complete (you'll see in the Status column Successful for all items), you need to rename your folder on your backup drive.
Open a file explorer and click on the USB backup drive.
Rename the folder from Backups to Backups 12-20-20 (or whatever date you did the backups)
By renaming the folder, next time you run your backups you'll have a completely new set of backups.
When your drive starts getting full, just delete the older backups (now you'll see the reason for renaming the folder and adding a date.)
On my 1T drive, I can save about 8 months of backups....it all depends on how many files you have to back up.
SyncBack: (Optional) Schedule the Profile Group
In Task Scheduler do the following:
Click on Create Task
Name it: SyncBack Backups
Run with highest privileges
Configure for Windows 10 (or whatever your current Windows version is)
Action tab:
Click on New / Start A Program / Browse the program files folder for syncback.exe file (2BrightSparks)
Arguements: add this -m "00" (where "00" is the name of the SyncBack Profile Group
Conditions tab: Put check in the box for Wake The Computer to Run this Task
Settings tab:
Check in box for 'Run task as soon as possible after a scheduled start is missed'
Triggers tab:
New / Set for Weekly / Choose the start date & time that SyncBack is to run
Choose the day of the week backups are to run
Ensure Enabled is checked
Ok, then OK again, Close Task Scheduler.
SyncBack: (Optional) Automatic Rename folder to add the date after backup
Having SyncBack run in the morning as usual, setup the following to rename G:\Desktop Backup to G:\Desktop Backup 03-26-2012
That way, when SyncBack is run again, you'll have a new complete set of backups and keep the old.
Step 1:
Create a .bat file using Notepad with the following 4 lines of text:
@ECHO OFF
FOR /F "tokens=1-4 delims=/ " %%I IN ('DATE /t') DO SET mydate=%%J-%%K-%%L
ECHO The value is "%mydate%"
rename C:\Users\Tracy\Downloads\Backup Backup-%mydate%
Change the folder directory as needed.
The above will change the folder from:
C:\Users\Tracy\Downloads\Backup
to
C:\Users\Tracy\Downloads\Backup-03/26/2012 (or whatever the current date is)
Save the file as "rename_folder.bat" (including the quote marks) into the root G:\ directory (or whatever folder you want)
Step 2:
After SyncBack is set up with the profiles
In Task Scheduler do the following:
Create a new task
Name it: Rename Backup Folder
Run with highest privileges
Configure for Windows 7
Action tab:
New / Start A Program / Browse for the G:\rename_folder.bat file
Settings tab:
Check in box for 'Run task as soon as possible after a scheduled start is missed'
Triggers tab:
New / Set for Weekly / Choose the start date on the same day that SyncBack runs
Set the time for about 5 hours after SyncBack is scheduled to run
Choose the same day of the week that SyncBack runs
OK and close the task manager
SystemExplorer reset Alt+Space to move a windows
Restore Alt+Space after installing SystemExplorer program
Press alt+space
Put a check in the box then press cancel
Press alt+space again and remove check and press cancel again
Alt+Space should now work with program windows
Toyota Entune: Fuel not working
When the fuel prices won't work:
Open the Toyota app on the phone
Tap on the Toyota SUV words or the car picture
Tap on App Suite
Tap on Connect
Stocks will not work in the 2017 and older vehicles
Verizon sending Text/Picture Messages
To send a text message from an email, the TO would be: 9135551212@vtext.com
To send a picture/video message from an email, the TO would be: 9135551212@vzwpix.com
Windows Defender Scanning History
Apparently, Defender is scanning its own History file, and continually finds what it already found and either removed or quarantined. VERY annoying.
Here's how to make it stop. I'm sure it will create a new History folder.
Go to: C:\ProgramData\Microsoft\Windows Defender\Scans\History\Service
In the "Service" folder, find and delete "Detection History"
Note: ProgramData is a hidden file. In order to access it, the "Hidden Items" option in "File Explorer" must be checked. Find the "Hidden Items" check box under the "View Tab".
And, the first time that you access "Scans", you must select "continue", to obtain the permission.
Here's where I found out about this:
https://answers.microsoft.com/en-us/windows/forum/all/windows-defender-identifies-the-same-pup-as-a/63f17794-3815-4784-b9cd-c6059c8e0828