 Computer Help
USAF Retired/Spouse 
Open regedit and navigate your way to both of the following entries:
HKEY_LOCAL_MACHINE\SOFTWARE\Microsoft\Windows\CurrentVersion\Explorer\MyComputer\NameSpace\
Remove the folder on the left for: {0DB7E03F-FC29-4DC6-9020-FF41B59E513A}
HKEY_LOCAL_MACHINE\SOFTWARE\Wow6432Node\Microsoft\Windows\CurrentVersion\Explorer\MyComputer\NameSpace\
Remove the folder on the left for: {0DB7E03F-FC29-4DC6-9020-FF41B59E513A}
Note: WOW folder may or may not be listed
Note: the tip for "Access Denied" is also repeated in the tip page for Windows-Working With
Short and simple, especially when you're trying to copy files from an external drive before it's destroyed or dies completely:
On the external drive, go to the user folder (Documents and Settings, or Users)
Right click on the My Documents sub folder (or even the actual {User} name folder
Go to:
Properties
Security (tab)
Advanced (button at the bottom)
Owner (tab)
Edit (button)
Change to Tracy(Laptop) or whatever your computers name is that has the external drive hooked to it
At the bottom on the left, put the check in the box for 'Replace owner and sub-containers and objects'
Click on Apply, Yes, OK, OK, OK
Open a command prompt (Run as Administrator) (you MUST do that part)
Type the following:
icacls "{driveletter}:\System Volume Information" /grant Administrator:f
where 'System Volume Information' will be the folder you want the access to and use the " marks.
To restore the permission, type the same link only use R instead of G.
You know if you don't want it and if you'll never use it. However, you can't really delete these folders because Windows regards these as "system folders". But you CAN make them reside somewhere else so they are not in your Pictures folder and screw up your filing system
Open a File Explorer and navigate to: C:\Users\YOUR_NAME\AppData\Local
Create a new folder in there called Camera Roll
Create another folder called Saved Pictures
Now...go to your normal Pictures folder and right click on the Camera Roll folder then choose Properties
Click on the Location tab and click on Move...
Navigate to the folder you just created in the AppData\Local folder, click on the Camera Roll folder and click on Select Folder
Click on the General tab and put the check in the box for Hidden
Click on Apply and choose '...this folder, and subfolders'
Then choose Yes, then OK
Repeat procedures for the Saved Pictures folder.
Close File Explorer and open again and you'll see that they are no longer viewable.
Double click on a columns double arrow to "make it fit" to the longest needed length.
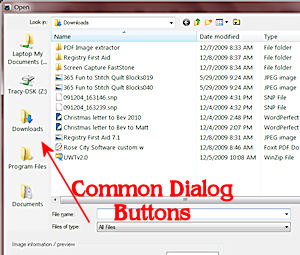
When opening a file, you may have icons on the left side of the dialog box. Some programs still have these. PaintShop Pro is one of them. The dialog boxes look similar to this:
You can make the changes manually in the registry
Open regedit and navigate your way to:
HKEY_CURRENT_USER\Software\Microsoft\Windows\CurrentVersion\Policies\comdlg32\PlacesBar (create the keys if necessary)
If they are there, then double click on any of the DWORD icons that you don't want and change the value to what you DO want...such as a specific folder, such as: C:\Graphics\CD\Landscapes
If you need to add them, create new DWORDS in the PlacesBar key
After you create the key, right click in a blank area and choose New, DWORD and call it Place0. You can have 5 strings in there: Place0, Place1, Place2, Place3, and Place4.
To add a path to a specific folder, such as C:\Graphics\CD\Landscapes.
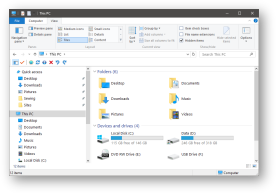
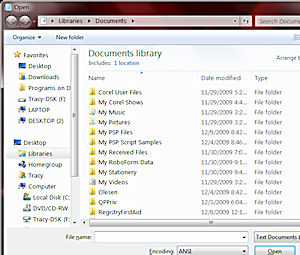
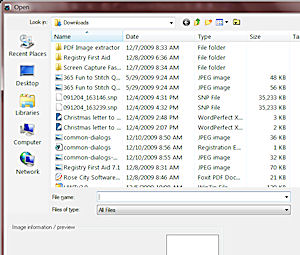
These are 3 images showing what Windows has as a default, what Windows has with the Common Dialogs default, and my adjusted Common Dialogs example
Did you know that you can use your mouse to "box up" a selected group of files all at once?
All you have to do is first click in anywhere there is a blank spot. (This ensures that there are no files already selected). Then click and hold your mouse starting at the bottom file (just to the right of the file so it will start in the white area) and drag up and to the left to the top file you want to capture. This will create a box around the group of files and select them at the same time.
If you moved, renamed, or even deleted a file by accident, before you do anything else, press Edit, Undo. Or you can use the
keystrokes Ctrl+z.
You'll be saved from the problems you may have encountered.
All you have to do is press the key combination of Windows+ E. This will open an explorer at the root directory.
Want to select every file in a folder but one? Or every one but two or three? Windows Invert Selection command takes the tedium out of file
selection.
With a folder window open, select the file(s) you don't want, then pull down the Edit command and choose Invert Selection. When you let go, everything that wasn't selected now is, and the files (or file) you had selected are left out completely.
The Invert Selection command is available in any Explorer window, too. Just select the files you don't want in the right pane, then choose Invert Selection under Edit to reverse your selection.
Option 1: Middle click on your mouse on the File Explorer icon (if you have a middle button)
Option 2: Shift/hold and click on the icon
Do it as for as many windows open as you want.
Works great for any other program you can have more than one instance of the program open, like Notepad.
In Windows 11 you can use tabbed windows, just like in a browser.
Make sure Snapping is turned on: System > Multi-Tasking > Snap Windows (turned on)
On the left side, click on any folder you want to have added to your Quick Access list at the top
Right click and choose Pin to Quick Access
Rename the folder if desired. This will only rename the shortcut to that folder, not the folder itself.
You can also remove any up there by right-clicking and choose Unpin from Quick Access
Quick Access is automatically filling up....make it stop and put on there what YOU want
Open a File Explorer.
Click on the 3 dots, then choose Options
At the bottom UNcheck the bottom 3 boxes in Privacy section
Windows 11 has trimmed down the right-click options when you right click on a file explorer. But you can get them back with adding an entry in regedit.
Right click on Start > Terminal (Admin)
Copy this code and paste it in there.
reg.exe add "HKCU\Software\Classes\CLSID\{86ca1aa0-34aa-4e8b-a509-50c905bae2a2}\InprocServer32" /f /ve
Close the Terminal window
Using TaskManager, use End Task on File Explorer, then click on Run New Task and type Explorer to start it up again
Right click on a file and you'll see the full list of options as before.
If you want the new style back, go into the registry and delete the key listed above.
In Explorer, you can select all the files rather quickly. Just click on the directory you want, then press Ctrl+A. Now they are all highlighted.
When would you use this? Well, I copy all my tips files to a flash/USB drive. They are all in the same directory with no other files. Quickly I can select all and right-click and drag & drop to where I want. Then I can choose either Move or Copy to the new location.
When you open an Explorer and click on a folder, you get the size of the contents of that folder, but not the entire size. What about including all of the sub-folders?
Well, open an Explorer. Right-click on the directory in question and select Properties. A dialog box will open and it will tell you how many files, folders, and the total amount of all files, including all of the sub-folders, in that directory.
You can sort your files by any column. Make sure that you are viewing an Explorer in the Details view. (View, Details)
When you click on the column title, that column will sort from A-Z (or lowest number to highest). If you click on that column title again, it will sort in reverse from Z-A (or highest number to lowest number).
This can be helpful when looking for certain types of files, such as .log, or .doc, .wpd or any other file type. Also if you're looking for the most recently used file in any given directory.
This is a simple one
Sort first how you want as directed above in the previous tip
Hold the SHIFT key down and click on the column title of the secondary sort column you want.
That's it. All sorted by your first choice, then your second choice.
Just like a browser, File Explorer can now have tabbed windows
All you have to do is click on the + at the top to open a second explorer in the same window....just like tabs in a browser.
In any open Window Explorer, change the view style to what you
want to use for every time you open an Explorer. (Example: Icons, Details View)
Click on the View button, then choose what you want to have
Click on the three dots on the menu back, then click on Options
Click on the View tab then click the button for Apply to all folders.
Then click Yes to confirm and then click OK.